
Nước Cốt Dừa – Vietnamese Coconut Milk

If you’ve ever tasted fresh Vietnamese coconut milk made from scratch, you know the difference. The version from a can doesn’t come close. Nước cốt dừa, or Vietnamese coconut milk, appears frequently in the dishes of Southern Vietnam, from street food to fine dining.
You’ll find it in desserts like steamed rice cakes and sweet soups, as well as savory dishes like curry. The freshness and richness of coconut milk are indisputable; they boost each dish to a whole new level.
The most flavorful version is always made the old-fashioned way—by hand with coconut and a piece of cloth. That’s exactly what I am going to show you today.
What Is Vietnamese Coconut Milk?
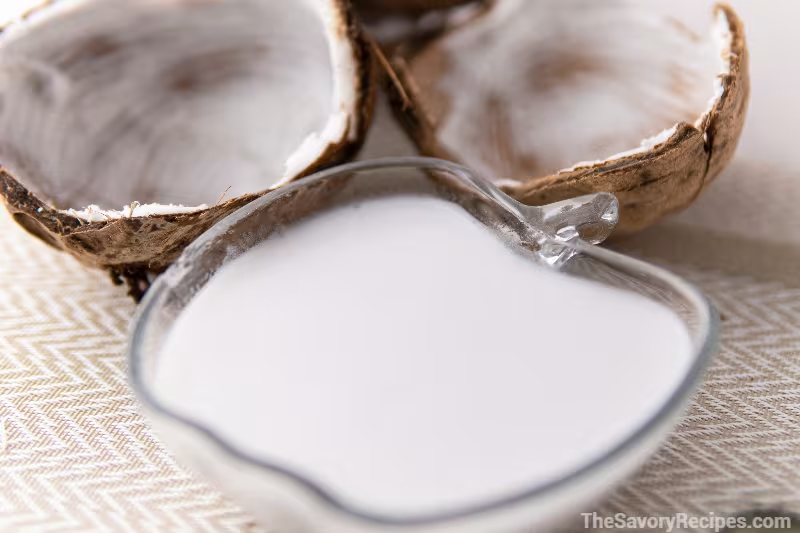
Vietnamese coconut milk, or Nước cốt dừa, is the rich, creamy liquid pressed from mature coconut flesh and mixed with water. The name literally means ‘coconut extract water. In Vietnam, it’s deeply tied to southern cooking, where coconut palms thrive. The ingredient appears in everything from chè desserts to cà ri.
It’s not the same as coconut water, which is the clear liquid inside a young coconut. It’s also different from coconut cream, which is just extra-concentrated coconut milk. Coconut milk and coconut cream come from the same source. The difference is in the ratio of coconut to water, and which press you’re collecting from.
In Vietnamese home cooking, the two extractions often serve different roles in the same dish. One provides richness; the other, volume. My recipe delivers a beautifully balanced result right in the middle. It’s thick enough for desserts, and smooth enough to cook with.
Ingredients, Substitutions & Adjustments
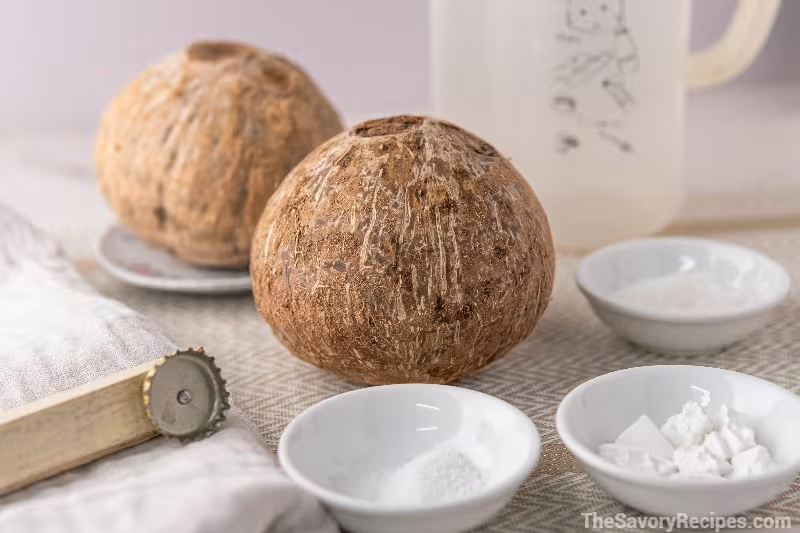
Coconuts
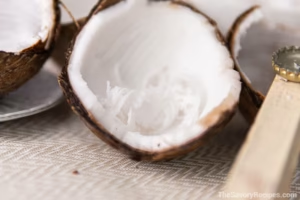
I make Vietnamese coconut milk with mature coconuts. These are the brown ones with thick flesh inside. Thick white flesh, high in natural fat, gives nước cốt dừa its signature creaminess. You can find mature coconuts at Asian grocery stores, large supermarkets with an international foods section, or specialty markets.
Look for coconuts that feel heavy for their size and have a deep brown shell with no cracks or mold. Shake the coconut close to your ear—it should sound like it contains some liquid, which means it is fresh. A young coconut, the green or trimmed white type, has softer, jellylike flesh and much less fat.
The milk it produces is watery, pale, and doesn’t hold together well. Always choose brown and heavy coconuts for this recipe.
Water
Using hot water instead of cold isn’t just a choice. Hot water around 70°C to 80°C (160-180°F) helps melt the coconut fats better than cold water. This means you get more milk from the same amount of coconut flesh.
Cheesecloth, Blender
You’ll need a high-speed blender and a cheesecloth or clean nut milk bag for straining. If you don’t have cheesecloth, you can use a fine mesh strainer, a thin dish towel, a clean T-shirt, a nut milk bag, or even a large coffee filter.
Squeezing by hand through a dish towel or T-shirt takes a little more effort, but it works well in a pinch. A fine mesh strainer makes the process quick, though the result might not be quite as smooth. You’ll also need a large bowl to catch all the liquid, a medium saucepan, and
How to Make Vietnamese Coconut Milk?

Prepare the coconut flesh
Find the three ‘eyes’ at the top of the coconut. Use a skewer or sharp knife to pierce one. Drain the coconut water into a glass and set it aside. It’s great for drinking or adding to soups. Wrap the coconut in a kitchen towel and strike it firmly along its equator with the back of a heavy knife or a meat mallet. It should crack in two or three hits. A solid strike at the middle gives the cleanest break.
Once cracked, use a coconut grating tool. If you don’t have one, DIY one by nailing a bottle cap to a stick. Grate the flesh into small pieces. Or, pry the white flesh from the shell, peel off the thin brown skin, and cut it as thin as you can with a peeler to make blending easier.
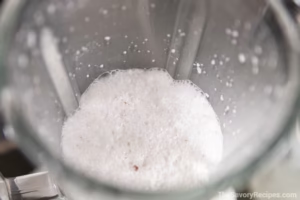
Blend the Coconut with Hot Water
Put the grated coconut in your blender with hot water. The best ratio is about 1 part coconut to 0.5 part water—enough liquid to blend well but not too much to make it watery. Blend on high for 1–2 minutes. Don’t just blend quickly for 30 seconds.
Coconut flesh contains fat cells protected by fibrous walls. A longer blend breaks down these walls, releasing more natural oils and proteins into the water. It’s ready when the mixture is smooth, milky white, and a little frothy.
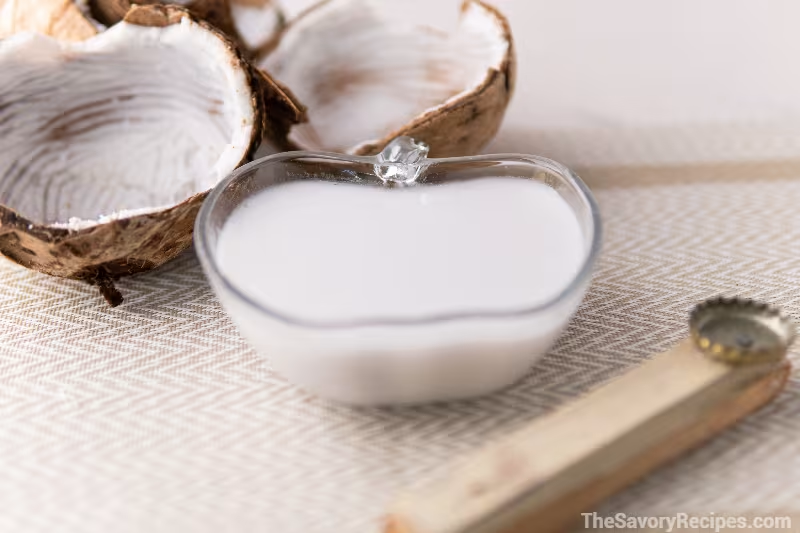
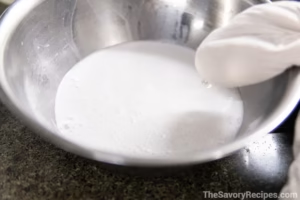
Squeeze out all the coconut extract
Pour the blended coconut into a cheesecloth over a large bowl. Gather the cloth into a bundle and squeeze hard with both hands. Keep squeezing until the coconut pulp feels almost dry.
The liquid that comes through is the richest and thickest nước cốt dừa you’ll get. Don’t rush it.
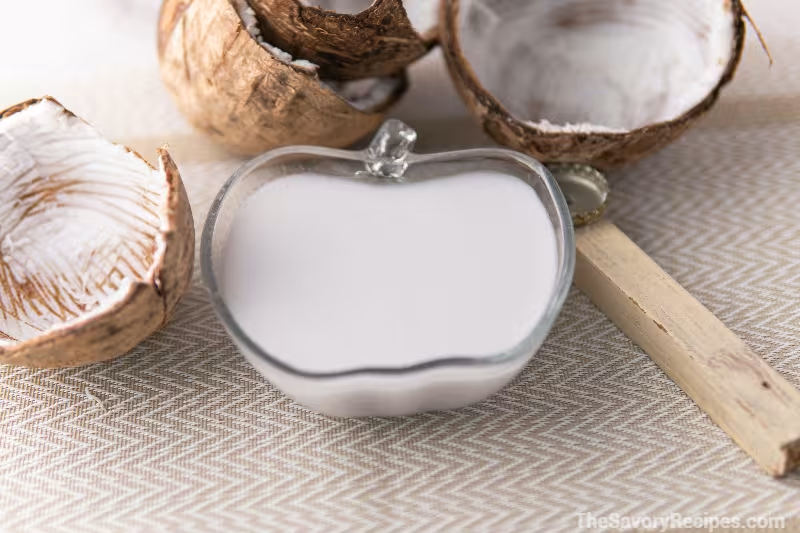
Cook the Coconut Milk
Put fresh coconut milk, salt, and sugar into a medium saucepan. Stir to combine. Heat over low heat, never high. When the milk begins to gently simmer, mix tapioca starch with cold water in a small bowl until fully dissolved. Slowly pour the starch slurry into the simmering coconut milk while stirring constantly.
You can customize your thickness by adjusting the starch slurry. If you don’t have tapioca starch, you can use cornstarch or arrowroot powder instead; both work well to thicken the sauce. Choose the thickener that fits your dietary needs or what you have on hand.
Keep stirring for 1–2 minutes until the sauce thickens. Turn the heat off immediately.
Frequently Asked Questions
Fresh Vietnamese coconut milk stays good in the fridge for 1-2 weeks if kept in a sealed container. For longer storage, freeze it in ice cube trays for up to 1 month. Since it has no preservatives, keep it cold and sealed to stop it from spoiling quickly.
To use frozen coconut milk, simply transfer the cubes or portions to the refrigerator and let them thaw overnight, or place them at room temperature for a few hours until fully defrosted. After thawing, you may notice that the coconut milk has separated into layers. This is natural—just stir or whisk it well until the texture is smooth and creamy again before using.
Canned coconut milk is made by machine and often has gums, emulsifiers, and preservatives to keep it fresh and smooth. While these help with convenience, they can make canned coconut milk taste flat or a bit metallic compared to fresh milk.
Homemade Vietnamese coconut milk tastes fresher and more delicate. It has a natural sweetness and a clean coconut smell in the kitchen. It also has a richer flavor because the natural coconut oils stay intact when you press fresh coconut instead of processing it in large amounts.
Yes, canned full-fat coconut milk can be used in most recipes. But if you’re making a Vietnamese dessert where nước cốt dừa is the main ingredient, fresh is better. The flavor difference is easiest to notice when the coconut milk is served hot and uncooked. This is how it’s often enjoyed in Vietnam.
The short list: chè (Vietnamese sweet soups and desserts), bánh xèo (sizzling crepes), cà ri (curry), xôi dừa (coconut sticky rice), bánh chuối (banana cake), and bánh da lợn (steamed layered cake). If a dish comes from southern Vietnam and has a creamy, slightly sweet richness, there’s a good chance nước cốt dừa is involved.
By taking just 4 steps, you can make your own coconut milk at home, which sounds harder than it is. Once you try it, you’ll wonder why you ever settled for the can. Here’s what to remember: start with a heavy, mature brown coconut. Use hot water to maximize extraction. Cook the final sauce low and slow to keep it silky and smooth.
Try this recipe the next time you’re making chè or simply want your dessert more flavorful. If you do, I’d love to hear about it—leave your results in the comments below!
Did you use it over red bean chè? Sticky rice? Or maybe just snuck a spoonful straight from the pot? All are excellent choices! 🥥
Nước Cốt Dừa – Vietnamese Coconut Milk
Equipments
- 1 Blender
- 1 Grating tool You can create your own by by nailing a bottle cap to a stick
- 1 Cheesecloth You can substitute with nut milk bag, mesh strainer or even a large coffee filter
Ingredients
- 2 Mature coconut ( the old ones) Approximately 500g grated coconut flesh
- 1 cup Hot water
- ½ tsp Salt
- 2 tbsp Sugar
- 1 tbsp tapioca starch
Instructions
- Crack the coconut in half, then grate the flesh directly or scoop it out, peel off the brown skin, and cut into small pieces for easier blending.
- Add grated coconut flesh and hot water (ideal ratio: 1 part coconut to 0.5 part water) to a blender and blend on high until the mixture is smooth and milky white.
- Pour the blended mixture into a cloth bag or thick cheesecloth. Squeeze firmly with both hands to extract as much liquid as possible.
- Add salt, sugar, and coconut milk to a pot and gently simmer. Mix tapioca starch with a little cold water, then slowly stir it in. Keep stirring until the coconut milk reaches your desired thickness, then turn off the heat immediately.


